The Role of Lime in Modern Green Architecture
Introduction: Embracing Eco-Friendly Architecture Welcome. In this blog we will be exploring the world of eco-friendly architecture and its profound impact on our environment. In

INTRODUCTION
TEST PROCEDURE & MORTAR MIXES
RESULTS
THE MORTAR MIX INGREDIENTS AND METHODS
LIGHTWEIGHT INSULATING LIME CONCRETE
I know that several people around the country have been using lime to make concrete for some time. Here at Old House we have been playing with limecrete for the last few years. As with all good experiments there has been an evolution in our thought process and trials. The first serious (well semi-serious) trials we did were as a result of an enquiry from a firm of Architects. They wanted to use limecrete for the floor of a large barn that would house an exhibition and asked us to carry out a series of trials leading to recommendations for a mix and methods of application (the floor slab was to contain un under-floor heating system). Extracts of our report are set out below:
After a visit to the site the following list of parameters was drawn up to consider:
The following points were subsequently confirmed:

Test panels 500mm x 500mm x 100mm deep were made up using a wooden frame backed with ply. Each panel had a different mix put into it and they were observed over a period of time. The aggregates for the mortar mix were chosen to provide a well-graded matrix, but with a vernacular feel. The aggregates were:
1 part Redlands ballast from their Caversham Quarry.
1 part Redlands sharp sand from their Caversham Quarry.
1/2part Redlands soft sand as dug from their Eversley Quarry.
The combination of these aggregates produced a blend close to a traditional as dug, un-washed material. The blend of aggregates remained constant but the binder was varied. The following binders were used:
Metastar 501 was chosen as a pozzolan due to its ease of availability, consistent performance and cost. The 13% gauging was equates to 2 litres of Metastar 501 added to a 15 litre bucket of hydraulic lime.
The two mixes using lump lime (6&7) were included because it was anticipated that shrinkage could be a problem. Contemporary 19th century documents talk of using hot lime concrete for under pinning because it expands. Hence we considered that using lump lime to make a hot mix would combat any shrinkage. The mixes did expand, but to an extent that they broke up rising up above their boxes like a cake in an oven. We considered that allowing them to mix longer could control this problem, but since none of the other mixes showed signs of shrinkage we decided to rule them out in order to reduce the risk of error on site.
All ten mixes were mixed wet in a small Belle concrete mixer. The results after 14 days show comparisons:
The results after 14 weeks showed that all of the mixes (except 6 & 7) were similar. They were all very hard but could be scratched using a steel nail. It is anticipated that the floor mix will continue to gain strength over the next year or two.
There were no shrinkage problems noted with any of the mixes, although the test panels were only 500mm square.
The same test was run again on the five most suitable mixes (1,2,4,5 &9) and similar results observed.
Since the Hydraulic Lias Limes HL2 was the only British hydraulic lime in the trial and that it is reasonably local to the project (30 to 40 miles) we decided to persevere with mix No5 despite the fact that its early performance was exceeded by mix No 1 and mix No 8.
A test panel approx 500mm x 2000mm x 100mm deep was constructed and mix No 5 was used to fill it. 25mm of mortar was laid out, the heating element put in place and then the remaining 75mm laid in. Again a cement mixer was used, this time a problem arose. The hydraulic lime and aggregate required enough water to be included to stop the mix forming dry balls, however it became clear that after mixing for a while the mix became too wet. Attempts to reduce the water content and prevent balling were unsuccessful and the wet mix was used to lay the panel. This subsequently cracked in three places and despite floating over, cracked again.
The same mix was then tried in a pan mixer (or paddle mixer). The superior mixing action allowed the right moisture content to be achieved (a dry mix that can be compressed into balls – similar to a modem cement based floor screed). This mix proved to be easy to compact into place and float over, although the large stones in the ballast made floating difficult. The mix showed absolutely no signs of shrinkage when set.
Following the trials we drew up a draft specification:
The mortar mix:
30 litres Redlands sharp sand from their Caversham Quarry (or similar).
7.5 litres Redlands soft sand as dug from their Eversley Quarry (or similar).
15 litres of hydraulic lime (see below).
2 or 3 litres of Metastar 501. *
The hydraulic limes identified as being suitable were: – St. Astier NHL 5 – produced a good hard floor and would be very porous.
Hydraulic Lias Limes HL2 – produced a very good sample and is known to increase in strength with time due to its high free lime content. Also locally produced.
Although the Jura-kalk is definitely the hardest of all the mixes tried, it is probably the least porous and is thus ruled out. (The metastar would not be needed if using Jura-kalk since there is only 3% free lime for it to react with).
Further research has indicated that the amount of Metastar 501 can be increased to 3 litres if using the Hydraulic Lias Limes HL2. This will produce a faster set and a harder floor without significantly compromising the porosity.
Mixing. The mixing will have to be done with care to achieve the best results. The ingredients should be accurately measured with gauging boxes or buckets. The mixing must be done in a pan/paddle type mixer or a screed mixer in order to get it well mixed but not too wet. The mix should be just wet enough to form a cohesive ball when subjected to hand pressure. (will form a “snowball”). Mortar should be laid within two hours of mixing.
This project left us wondering how we could achieve a porous lime based concrete that could be used with an under-floor heating system and insulation. Our next opportunity for experimentation came when we were developing a repair specification for a project in Henley. The building was a 17th century timber framed stable block known as The King’s Arms Barn. Here amateur archeologists had dug up most of the original stable brick floor and so it was ideal for it to be re-laid over lime concrete and insulation. We had two further points to consider:
We decided to look at the expanded clay insulation that is often used in chimney lining systems (Fibo-fill in our case). This comes as a series of balls of lightweight expanded clay. We wondered whether we would have to crush it up or mix it with sand to achieve a well-graded mix, and if so how it would affect the insulation values. We were extremely pleased to find that we could get the Fibo-fill in a range of different sizes ranging from about 1mm to 20mm diameter. Having obtained some bags of the material we set about making up a well-graded aggregate form it and then mixing it with hydraulic lime. Since we were looking for a high strength material we used St Astier NHL 5. The mix was:
This was mixed fairly wet and put into a test cube mold. The test cubes were tested at Oxford Brookes University and the results were:
The test cubes produced were amazing, they were a very pale grey colour when dry and very light. The 100mm test cube weighed approx 1Kg. This is the same density as water rather than conventional, cement based, concrete. The cubes were placed on top of a storage heater to assist their drying. After several hours we noticed that although the bottom surface was hot the top was still cold.
We wanted to lay our limecrete directly onto the subsoil without any sort of dpm, but we were concerned about its capillarity (ability to draw moisture up). We set up a simple experiment with a tray of wet sand. We stood the limecrete test cube in the sand and did the same with a soft red handmade brick. Both drew up water at a similar rate and to the same height. We felt that the capillarity noted was on the borderline of being safe for our project. Consequently we decided to construct our floor using 100mm of the 20mm fibo-fill insulation without any lime binder (loose). Then a Terram geotextile layer (porous) followed by a 100mm layer of our limecrete. On top of this we laid 40mm thick brick pammets (tiles) on a 10mm hydraulic lime bedding mortar.
There was a period of around 8 to 10 weeks between laying the limecrete and putting the pammets down. During this time we had a chance to observe the performance of the limecrete. It was easy to lay and started to set quickly (3hrs). It hardened to a point where foot traffic didn’t damaged it (we kept off it for 48 hrs). The rooms concerned felt noticeably warmer than they would have done with a cement based ordinary concrete slab.
The porous nature of the floor initially meant that it was damp around the edges where it was in contact with the damp walls of the barn (brick and flint). However over the course of around 9 months the walls and floor have both noticeably dried out to an acceptable level (now used as a Tourist Information Office).
As a result of giving a short presentation on this material last year at The BLF Gathering in Kent some students at Bradford University have been looking at the material in greater depth. The areas we highlighted for further research were:
Assess:
Can any of these mixes be used without a finishing material?
Look at surface finishing e.g. tamping, floating, toweling, power floating etc.
Assess the impact of under floor heating when used with these materials.
Look at detailing particularly junctions with other materials (walls etc).
Look at problems and benefits of a lightweight material.
We await their published results.
I hope that some of you reading this will realize the enormous potential of being able to use a concrete slab in an old building without it pushing water up the walls and also getting the added benefits of insulation (150mm gives a U-value of 0.45 when used with cement concrete). I think this materials is an ideal partner to under-floor heating which in itself is often the most appropriate form for historic buildings.
Copyright © Ian Pritchett, August 2001.
Introduction: Embracing Eco-Friendly Architecture Welcome. In this blog we will be exploring the world of eco-friendly architecture and its profound impact on our environment. In

You’ve probably heard that we’re attempting to live in an eco-friendly world. When it comes to your home, you want to make sure that it
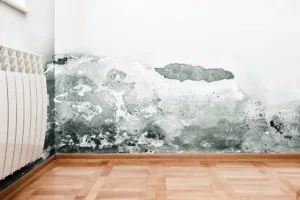
Mould is more than an aesthetic nuisance; it is a symptom of a building that cannot “breathe.” Whether you are managing a 200-year-old listed cottage
